2019-09-27
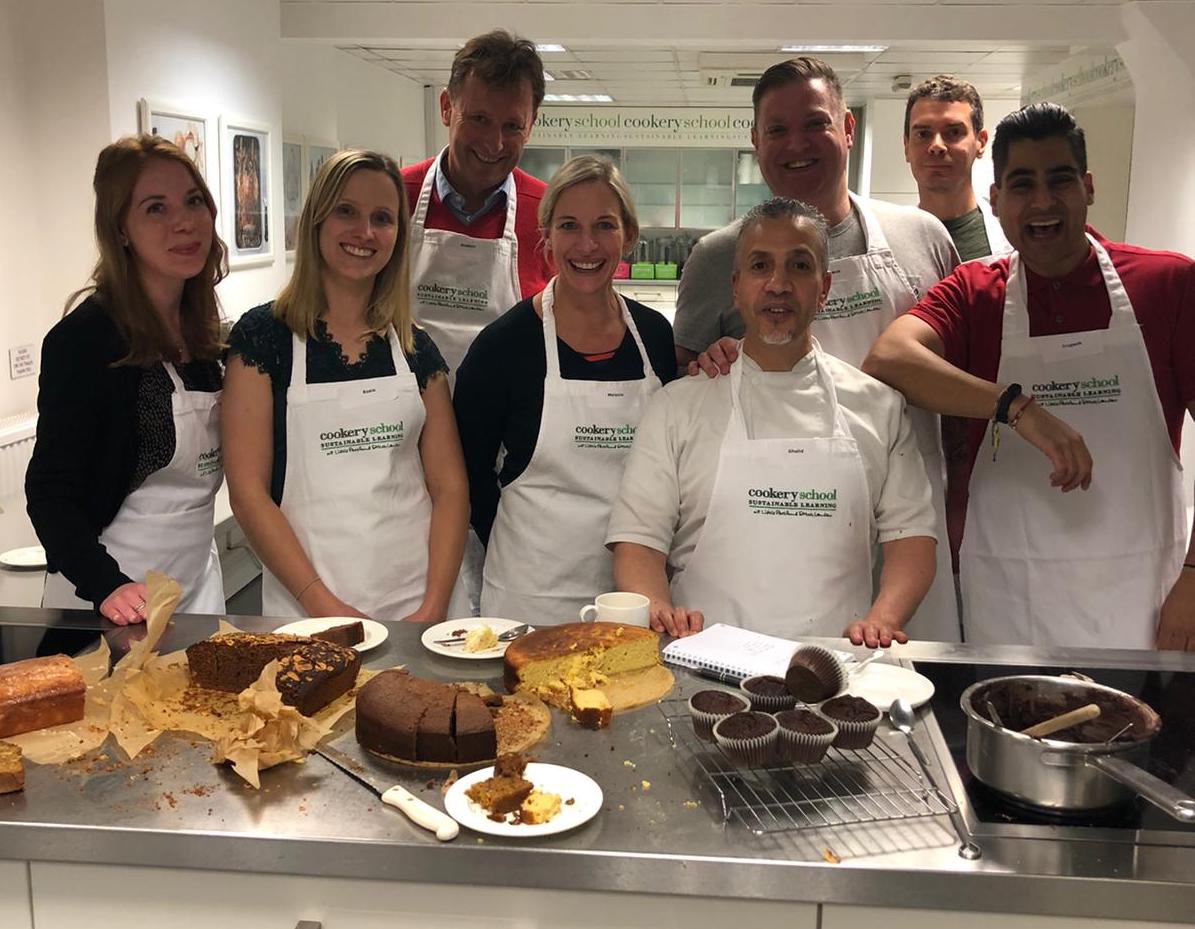
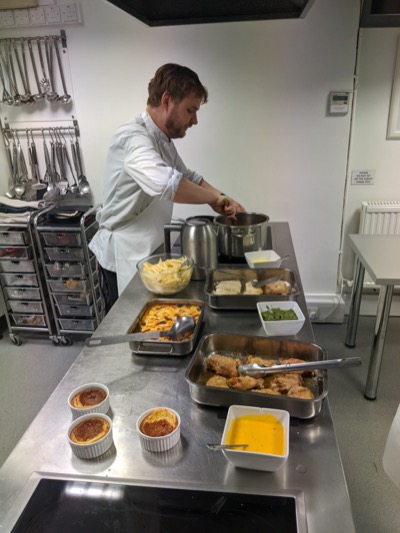
These are some notes from the “Intermediate cookery” evening course at Little Portland Street cookery school in London.
I had a great time on this course, you are provided with recipes but it really concentrates more on understanding and skills which is exactly what I wanted. Looking forward to practicing these and then taking further courses.
The notes below are to be read alongside the recipe book. Many thanks to Melanie for letting me copy her notes to fill in gaps below! Also to Vaida for preparing everything and cleaning up after us :-)
Introduction
The course ran for eight weeks 6:30-9:15, if you couldn’t attend one week I think you can go another time (but you must tell them in advance). There were normally seven of us but one week there were nine. Many dishes were somewhat prepared to save time (e.g. pre-chopped), I’d say the course was about 40% watching, 30% preparing, 20% cooking, 10% eating.
Week 1 - Meat (with Stefan)
Browning meat is purely for Maillard reaction - this gives all the lovely flavours and a nice colour to the meat.
Two types of meat - that which has been worked hard throughout the life of the animal (thighs, shoulders etc) and that which has had a lazy time (e.g. fillet). Well hung meat is more tender (dark red, not bright red).
Tougher cuts have much more flavour but typically wants hours of cooking to break down the tougher collagen into soft gelatin. (NB: adding a little acid such as vinegar or lemon to a marinade helps with this). You don’t need to brown all the meat - e.g. just top and bottom is sufficient, more will add more flavour. Hot pan, bit of oil, wait for meat to unpeal itself from the pan. Don’t add seasoning to the meat - it can draw the water out. Don’t overcrowd the pan - we aren’t steaming the meat. Between every 2nd/3rd batch deglaze the pan - a cup of water, scrape the lovely dark brown bits (“sucs”), pour the deglace into a jug (and reuse it each time). Use the deglace in the stew. You can also deglaze the final batch with onions.
Stewing - wait for collagen to turn into gelatin - 2-3 hours (or 45mins in pressure cooker). It’s ready when meat falls apart. If you want to thicken the liquid, take the meat out first, then high heat before returning the meat.
Lamb rack - salt well to render the fat down.
Tenderer (generally more expensive) cuts prefer cooking quickly to retain their tenderness. If you let them get too hot they’ll become tough. Use thumb/finger/palm test for readiness. Must leave meat to rest (keeps juices, allows it to relax and hence be more tender).
When frying only oil and salt - never anything else until right near the end (e.g. butter and herbs). Can oil pan (unless it’s a griddle) or meat. For tender cuts, salt meat as well. Before cooking steak it should be at room temperature. When cooked leave it to rest for half the cooking time. Thumb/finger test (and check how hard your palm is) for doneness:
- rare - forefinger (40deg)
- med/rare - middle finger (40⁄45 deg)
- medium - third finger (50⁄55 deg)
- med/well - fourth finger
Always cut across the fibres in the meat - this makes it taste more tender and helps avoid getting it stuck between your teeth :-)
Salt enhances flavour (they used much more than I would have done), pepper is to your personal taste.
Rapeseed or sunflower when frying, olive oil for pretty much all the other cases as it has a bit of flavour.

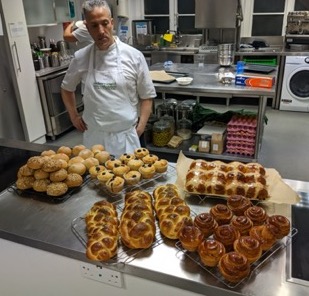
Week 2 - Bread (with Ghalid)
Strong flour for bread, plain for most other things (soda bread, corn bread, scones, muffins).
To mix, use one hand (lift and push with knuckles) and keep turning the bowl.
The wetter the dough, the softer the bread. Never flour for kneeding (it’ll dry it) - just pick up bread (from the top/bottom), lift up, move hands to the sides (i.e. turning the dough) and slap down onto work bench. Repeat for e.g. 10mins - it will stop being sticky. Use a dough scraper occasionally to get stuff off the workbench. Then kneed using heel of palm and rotating. Use the “windowpane” test - it should stretch well (rather than break) and be translucent.
Oil bowl and cover with damp towel to let it rise (this also allows it to ferment which will give more flavour).
Floured surfaces (lightly) for shaping, not for initial kneeding. To form rolls, divide with flour scraper, then roll gently under a cupped hand. Alternatively keep turning turning it and pull it over into the centre until firm. To put seeds on the top, hold the bottom of the dough, then dip the top into water then into the seeds.
Second rise - if you press the dough (lightlyish) then it should bounce back most of the way. If it bounces back all the way it’s not risen yet.
Once baked the rolls should be hard, light and sound hollow when tapped on their bottom.
Cinnamon rolls - don’t work the dough too much, it’ll become tough. Can spread water or butter to help the sugar mixture to stick. Don’t forget to egg-wash them.
Chollah plait - 5 strands, arranged in a splayed hand shape. Squeeze the braids together where all five meet. Take right most and take it over/under/over/under the other four strands. Repeat with what is the new right most strand. At the end merge them all back together. Then left the left/right and tuck under slightly to give it a nicer shape.
Muffins - (as noted) mix wet and dry ingredients separately to begin with. Then mix (by folding) as little as possible (but quickly), scoop (can use an ice-cream scoop) into muffin cases, more blueberries on top and bake.
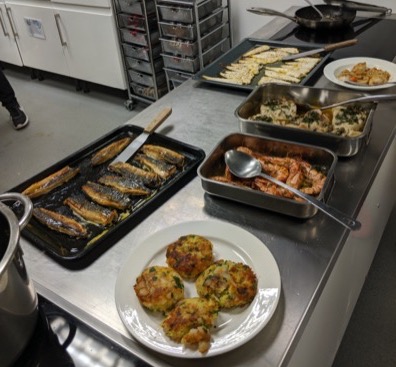
Week 3 - Fish and shellfish (with Stefan)
Beurre noisette - heat butter (add salt if unsalted). Let it spit (scrape off any stuff on top as that burns). It will then split, swirl it to mix back in and these dairy bits will start to fry. Leave it (much much longer than you think) until it becomes a nice dark nutty colour and smell. Can add capers, lemon juice, parsley.
Prawns - cut down the backbone (from near the head down), insert a small knife and lift our the digestive tract. It’ll be there (but might be empty). Rinse and cook. To grill, oil, lemon juice, 2mins each side - should turn pink.
Poaching fish - you want hot stock, but not vigourously roiling as it will break up the fish. Fume - stock with fish bones. Leave skin on whilst poaching as it’ll hold the fish together. Cook salmon for 10mins then switch heat off, pollock for 5-6 mins. Meat will flake and become white - best to be undercooked than overcooked.
Muscles - don’t keep them underwater in fridge (they drown). Any closed ones are good, any chipped/broken ones bin, any open ones tap and keep any that move (they maybe very slow especially if cold). Don’t worry about barnacles etc, but trim the “beards” (looks like moss coming out of them) - just hold the beard and firmly pull towards the hinge end so that it snaps off. After cooking throw away any that aren’t fully opened. Never store muscles in water (they’ll drown).
Squid - hold tenticles and pull to remove them + body from the mantle. Then cut the tentacles just below the eyes (towards the tentacles end of course) - discard the body. Squeeze the tentacles where you cut them (towards the tentacles end) as this may pop the beak out (or maybe it was in the body part). Remove the quill from the mantle, then pull the fins off (can be hard - best to grip them using the ridge of cartilage between them and the mantle). Now “skin” the mantle (i.e. removing the thin coloured film). Then cut it (gently) down one side to open it out. Clean the inside then score it - very very gentle pressure only. If the fins are a decent size you can also skin and score them - remove the ridge of cartilage along the body edge. Squid only takes about 4 mins to cook (dust in cornflour then fry) and then toughens up - but it will also soften back up after about 50 mins (the rule is “5 or 50 mins”) for stews.
Fish - eyes should be clear (or not too cloudy), scales should stick, not much smell at all, open the gills (with finger) - they should be red - if they are green do not eat.
To fillet a fish (where the fishmonger has already removed the guts), cut down to the backbone. Now cut up (in an arc) around the head and then down (cut so that the “empty” part where the guts where is removed). Cut up and down near the tail. Now take a filleting knife and cut with gentle stroke (and only a bit at a time, don’t try and do too much) along the backbone, trying to keep the knife as close to the bone as possible. Keep doing this until you get to the edge where the fins are, then you can often just grab and pull the fillet away. Then trim the fins and edge off. Four fillets if flat fish, two if round fish. To cook in over, good amount of olive oil (and add herbs, lemon zest, lemon juice, salt + pepper), 5mins in oven. No resting needed.
Scallops - take a normal blunt dinner knife and slide it down the flat shell (we are try to cut as much of the scallop off the shell as possible). The shell will open once you cut through it. Now pull off the skirt and anything else - although you can leave the roe (the orange bit) on if you like. Don’t wash them, but do wipe with a damp cloth. First cook, then add flavour.
Fish cakes - good amount of (pre-poached) fish to potato. Compress the mixture, can dust in flour, fry in veg oil until they have a good colour and are warmed though.
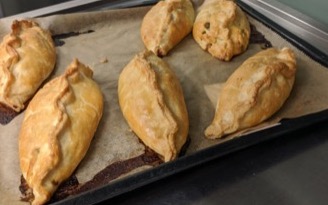
Week 4 - Pastry (with Ghalid)
Choux - water (mix with milk for increased richness), salt, butter in pan, heat up, (optionally remove from heat) then add flour in one go and beat until it turns into paste and pulls away from the sides of the pan. Remove from heat and beat (we are trying to cool it now and lose some steam), once it’s not really hot any more add eggs a bit at a time and beat (it’ll look like it’s splitting - don’t worry, but beat viciously from side to side, scraping the sides. Keep adding eggs until it sticks to a spoon held above the pan and has a glossy look. An upright spoon in the mixture should not really fall over (except slowly). If you like, add cheese, potato and a bit of mustard powder at this stage (for gougere or cheese aigrettes). If possible, leave mixture to rest for day. Bake (one tablespoon scroops) in oven hot (220, reduce to 180) for 30/40mins (try not to open door), they should be golden and crispy.
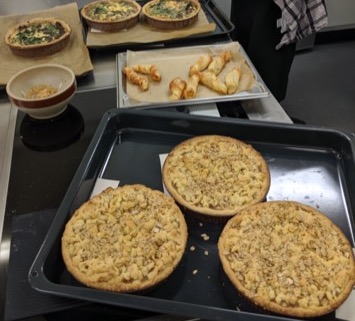
“pat sucre” (apple pie, mince pies, lemon tart) has butter, sugar and salt (all give flavour + colour) with a bit of baking powder. Hold butter in fingers, lightly mould like crumble. When still dry add egg yolk and pinch with fingers. You can mix with water quite well (it’s more forgiving as it has a high fat content). Dump in pastry case and push with fingers (thumbs on edge) until it it over the top (and effectively you push/slice it off with you thumbs). Cover and rest for an hour. When making the apple pie filling, you can mash it with a potato masher. For the top of the pie, either lattice work, or coursely grate the pastry(!) Scatter oats or almonds on top.
Shortcrust - for quiche use cold water, lightly dust table, roll & turn (repeatedly), drape over case, tuck into corners, do not cut it off, if you need to patch just press (don’t use water to glue). Prick base with fork, baking parchment + baking beans, blind bake (use a pre-heated tray under the dish), then trim excess pastry using a speed peeler.
For Cornish pasty, mix with little iced water (not too dry) and kneed very little until it’s very fine - like cous cous. Then add 2 tbsp cold water, pinch together gently, put on table, squash with hand, fold (with scraper) adn then fold, squash and roll out. Slighty thicker than quiche, cut around a plate, then lightly eggwash edge, put mixture in middle. Lift up both left and right edges, pinch them together starting at the top, working down to one end, then pick up pasty in one hand (open end upwards) and finish pinching the open half closed. Make the ripple across the top by using finger and thumb of one hand vs finger of the other hand. Eggwash (inc salt) + bake.
Puff pastry - add a bit of lemon to iced water (prevent browning in fridge). Make the dough base (quite dry), we want it relaxed so only lightly kneed. Leave as flattened ball (covered with bowl) cut a 2cm deep cross in top so you can see it open up as it relaxes (an hour or two in a cold place).
Once base dough is ready, take cold butter and hit with rolling pin starting at one corner working diagonally across to the other corner (you should be hitting perpendicular to the direction of travel). Keep doing this until it’s about 20cm square and 1cm thick. Roll pastry (from centre to each of the four corners) into a diamond shape so you can use it as an envelope with butter square in the middle. Try not to trap any air and try and seal it pretty well by pressing rolling pin across the top (not rolling).
Now press down with rolling pin across the bottom and top (again, to seal the butter in). Pound horizontally across the top with rolling pin. Try and keep it rectangular on the edges (tap with rolling pin if getting out of shape). Repeat with pin on the “ridges” from the prior pounding. Third time’s a charm. Now roll it until it’s about 6x1 shape. We’ll now do a double fold - firstly fold the ends in - but offset so about 1⁄6 and 5⁄6 when folded - then fold it in half (the first offset fold means that the ‘join’ isn’t in the middle. Brush off any flour as it’ll dry the pastry. Press two finger marks in (as a count of the number of folds). Wrap in clingfilm and leave it in the fridge to chill until cold (10-60mins). You’ll need at least two more double folds - or better yet, one more double, then two single folds. To do a single fold, it’s not just in half - it’s in thirds (so roll to 3x1 and fold each third in so it’s 1x1). You can spread sugar/nutella/parmesan in those last two folds to make cheese twists, palmiers. cheese twists - just cut into strips, twist, press ends onto the tray. Palmiers, fold in half, then unfold, then fold to line (i.e. quarters) then in again, cut… Often best to freeze the desserts before baking (helps stop butter melting).
Week 5 - Poultry (with John)
Your apron isn’t for wiping your hands on. It’s not even to stop you getting dirty. It’s to protect the food from you.
Started with refresher, e.g. frying onions. Olive oil is fine, don’t need a huge amount even when lots of onions - it’s only to stop them sticking. Put onions in from cold (hot olive oil turns carcinogenic and you can’t taste it). Takes 5-7mins/onion to get nice “hot dog style” brown (i.e. yes really 30mins for six onions).
Garlic: squash with knife, add a small amount of coarse salt, then smear with tip of the knife. Always add garlic once onions are cooked as they take mere seconds (until you can smell them).
Herbs: soft stalks can be cooked. Don’t chop excessively - as if they break down into mulch/wet the flavour will be left on the chopping board.
Stock - never boil as it’ll bring out the fat and become greasy, instead keep it hot and skim off any foam or oil from the top from time to time. You can put in carrot peelings (assuming carrots were washed first!), herbs, bones etc. Once you’re almost done, remove the bones and stuff and then you can boil to reduce it down.
Chicken, don’t wash it (to kill the bacteria you have to cook it, washing just spreads them). To check if it’s cooked, clear juices and 75°C for 3mins (or 80°C) - check the part between the thigh and the body.
Duck - score the skin and season with a bit of salt. Cook from cold (not room temp as for a steak). Medium hot pan (as it takes time) - 80% of the time it’s cooking skin side down. Keep pouring off the oil (e.g. hold duck with your fingers and just tip the pan). Leave it to rest (half the time it was cooking for).
Spatchcocking chicken - makes it cook faster, gives more surface to rub spices into. Remove the “parson’s nose” (bit at the bottom of the bird) as the little bump at the top is a scent gland and is very bitter. Turn the bird breast side down. Take knife or butchers scissors and cut through either side of the backbone (it’s cartilage, not bone). Remove the backbone. Now turn the bird over (breasts up) and push with the palm of your hand to break the breastbone. Done.
Boning a chicken (slow, butcher will do it in about 3-5mins). Remove the “parson’s nose” Turn the bird breast side down. Use a boning knife and “whispy” movements - use only the 2cm at the tip of the blade during the whole procedure. Remember that you are aiming to remove as much meat as posible from the bird. Also preserve as much skin as you can - it should be removed in one piece with no holes - the flap at the top/bottom is especially helpful). It will look like a horrendous mess - don’t worry, it’s all hidden once we roll it! Cartilage is white and can be cut, bone is grey and cannot be.
Start to slice along either side of the backbone. Just before the thighs are the “oysters” - release these from the bone by pressing with your thumbs (nail side up). This helps to show you where to go. Now use whispy movements and follow the bone exposed by the oysters away from the bird, start to cut through tendons etc until you get to the joint, then cut through the cartilage - this can be hard - it’s easiest if you expose the joint quite well then you can see the right angle to cut at. Then cut back towards the bird.
Working in the opposite direction now along the top of the bird, you’ll feel a bone that’s stuck out a fair bit - you must cut on the outside of this (we never take any bones with us except for the thigh bones). Keep working along this, eventually we’ll free the wings - pull the wings cut through the cartilage here and completely remove the wings from the bird (leaving as much meat as you can on the bird, not the wings) and set aside. Keep working along the entire length of the bird, working along the rib cage and then breastbone to release the breasts. At some point you’ll find it easiest to pick up the bird, allowing the meat and thighs to dangle beneath whilst you slowly free the meat. I found it easiest to work along the wishbones (once exposed) and then along the top of the breastbone to release the final part.
We now need to remove the thigh bone, leg bone and the very thin “pin” bone that runs right next to the leg bone. Cut straight down to the bone, then whisp away with the knife, perhaps using fingers underneath the bone, near the end it may be easier to bend the “knee” joint to expose it for cutting more easily - don’t worry about the mess.
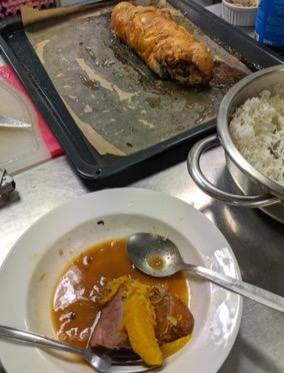
Check the chicken - you should have a large piece of skin with thigh meat on the two ends, then a gap (of just skin) and the breasts in the middle. Remove the “false fillets” (the little ones) and place them in the two gaps to fill them in. Place you stuffing in a line across the entire fillets section, stopping before the thighs. Then fold the thighs over at an angle and roll the chicken over tightly. Do not try and lift the parcel as it will fall apart. Instead, slide five lengths of string underneath, spaced evenly, then wrap around the top but no tighter than the chicken is - we don’t want unsightly indents.
Guinea fowl - older, more flavoured bird cf chicken. Brown the meat like a triangle (both breasts and bottom). Then braise (about 1/3rd up with stock, lid covered) until cooked.
Mushroom stuffing - pull stalks off, chop them and rest of the mushroom. Overseason the stuffing when it just has mushrooms in it (as we can’t check it once we’ve added the raw “chicken forcemeat”). Turn the heat up to get rid of all the water and concentrate the flavour.

Week 6 - Sweet sauces (with Marcella?)
Vanilla pods dry out very quickly (30mins) so don’t expose them until you are ready to slice and scrape them. Scraped pods can be put into sugar or alcohol to make vanilla sugar or flavoured spirit.
Creme anglaise - you can heat double cream up (with vanilla bean insides + pod) on a high heat (but later on we’ll want a low heat). Whisk eggs + sugar together until pale. Once cream is hot, start whisking the eggs/sugar mix whilst very very slowly adding the hot cream. If it starts to split, put it in a very cold water bath. Then return mix to low heat and beat continuously until it starts to coat the back of a spoon and has the right texture when you taste it. A metal spoon is easier to check than a wooden one. Run your finger down it and see how the custard reacts. You can use full fat milk but it’ll be runnier. If (even with cream) it’s runny, ensure that you aren’t letting too much egg white get into the mixture and perhaps add another yolk. Strain the custard to remove vanilla bean bits. If a skin forms, just whisk it in. You can add chocolate, strawberries etc once it’s cooked.
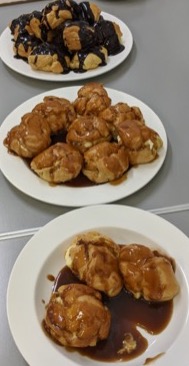
Creme pâtissière (“creme pât”) - made very similar to creme Anglaise, however it has flour in it and uses milk rather than cream. Again, add hot liquid very slowly, then heat until it’s thick and the taste of flour has gone. It’s a thicker creme used for stuffing. Once cooked and it starts to cool, it will start to form a skin - you must avoid this so if you aren’t going to use it immediately, cover it. Don’t use a plate, use some (scrunched up) baking parchment and press it over the top of the creme pat. By itself it’s quite rich, if you are e.g. stuffing profiteroles, you will want to mix 50⁄50 with whipped cream.
Chocolate sauce - put chocolate on top of butter in the pan (doesn’t need to be perfect, just good practice). Hot heat, shake rather than stir (as stiring will cool it and it’ll take longer). To make it runnier, add cream, to make it thicker, more icing sugar. If it splits, heat gently, add a splash of cold cream/milk and beat more. This freezes well.
Caramel sauce - we need the sugar to dissolve, and it can bubble, however we don’t want to boil it. To make salted caramel, add 1tsp to recipe (and taste), you may want more - Maldon flakes are great here.
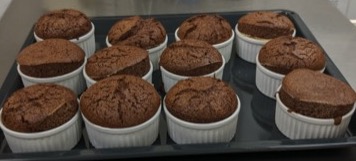
Chocolate souffle -egg whites should be beaten until very stiff. To beat the egg whites, keep you arm/elbow next to your body and just use your wrist (less tiring). To get more air in, use an exagerated motion over the top of the whites, then pull back towards you. The egg whites are stiff when they stay in the bowl when you turn it upside down. When first heating the mixture in the pan, we are partly cooking the mixture - don’t skimp. When folding the egg whites in, do it in two batches - the first to slacken the mixture (1⁄2 or 1⁄3 of egg whites), then when very roughly slackened, add the remaining egg white. Brush ramekin with melter butter, sugar them (didn’t seem to matter if they were heavily sugared even with a layer in the bottom), Pour mixture in 4/5th full. Do not overcook, wait until risen (even a couple of mins makes a big difference to the rise).
Week 7 - Savoury sauces (with Stefan)
Mother sauces are the base sauces, then my tweaking them you get daughter sauces.
Béchamel (white sauce). Technically must use infused milk to be a true bechamel. Can use any fat (oil is easiest but others may have more flavour). Mix flour and fat whilst cold, then add milk a bit at a time mixing thoroughly until it’s pretty liquid then you can add the rest. If you heat it too early it’ll go lumpy (can often recover with a whisk). Personally I’ve found with butter (which obviously must be melted) having warm milk (not hot!) helps it mix. Keep stiring, it’ll thicken although it can take time (needs to be hot). If adding cheese wait until the bechamel is cooked and only then add the cheese.
Tomato sauce - fry onions, add tomato. Any tomato - fresh (skinned, deseeded as the seeds aren’t nice and the insides are just watery), canned, pasata, pureed, sundried can be particularly good, especially for a puttanesca (strong flavour - olives, anchovies - goes well with pasta). There’s no need to cut up anchovies (ever) as they disintegrate during cooking into tiny pieces all by themeselves.
Hollandaise - butter and lemon. The cook book has the fast (food processor) variant (see Bearnaise recipe or here for traditional way). The technique is similar to mayonnaise (see below). This needs heat to cook, however the butter should be cold as this helps to regulate the temperature - probably helps to cube the butter (1-2cm on a side) in advance then pop back to chill. If it starts to get too thick, add a dash of hot water and mix. If it starts to split, place an egg yolk in another bain-marie with a splash of water, then add the split hollandaise very slowly (whisking all the time). Be careful when serving - don’t scrape any potentially “scrambled egg” bits on the side.
Bearnaise is a daughter sauce of Hollandaise and uses a vinegar reduction (which gives wider choice of flavours) rather than lemon.
The other classic mother sauces:
- Velouté - white stock (chicken, fish, veg) thickened with a roux
- Espagnole - brown stock with a brown roux - rarely used as is
The following mother sauces aren’t part of the classic five mother sauces but are very useful.
Red wine reduction - fry onions, add large chopped carrot/celery, then wine/port (port makes it richer), reduce down by about half (45-60mins) then strain. Keep reducing until down to about 75ml (yes, about 1.5l -> 75ml!) Don’t add bones to it - you could make a stock with the bones separately but adding bones to this will just put lots of scum on it. Excellent with meat or even on ice-cream!
Emulsions - e.g. mayonnaise (egg, oil, acid (lemon or vinegar)), aioli (olive oil and lemon). The lecithin in the yolks is resonsible for the emulsification (one yolk can emulsify 18 litres of oil). Lecithin is also in mustard hence why you commonly see mustard in mayonnaise and other emulsions. Begin by just adding one teasoon of the acid (too much at this stage makes your life hard), then add oil very slowly, whisking thoroughly. Keep going until about half the oil is used and the mixture is thickening, then you can go faster. At the end, taste and add more acid or flavouring if desired. If using a food processor you can go much faster and pour a steady steam of oil into the mixer.
Pesto - large pices (1-2”) of parmesan, chop in food processor until large breadcrumb (nicer than when it’s too fine), add pine nuts, basil, then process whilst pouring in oil. Don’t overmix (becomes chewy).
Souffle - over season before adding egg (as that’s going to dilute it). If you’d eat it before adding the egg there’s not enough salt. Add first third of whites to slacken the mixture, then another 3rd, then the rest. Remember, most should be folded, if there are large lumps of white, just spread them about individually with the spoon (so you aren’t working the whole mixture too much). Don’t bother lining or greasing ramekins, pour water into the tray unless they are small ramekins.
Week 8 - Cakes (with Ghalid)
Set oven temp 20-30degrees higher initially if it’s cold, turn it down when cake goes in. This helps to compensate for cold air. Furthermore, don’t trust pre-heat lights - they are measuring air temp, it’s advisable to leave the oven another 10mins or so past when the light turns off so that the oven walls are up to temp.
Note: kitchenaid has a beating attachment (the paddle - equivalent to the wooden spoon) and a whisk. Use the right one!
Use room temperature ingredients. Don’t forget to add salt - it adds flavour and also colour.
More than ever, it’s critical all ingredients are prepared, cake tins greased/lined, oven pre-heated (to prevent collapse of cakes) - especially for anything with baking powder (inc SR flour). To line a round tin, use a cartouche method: fold paper in half/quarter/eights/sixteenths to form a trianglular template, then use the radius of the tin to cut it into a circle. To line a rectangular tin, make a diagonal cut from each corner (only needs to be rough), apply a little oil/butter to the tin so the paper sticks to it (you don’t want the paper to pull away and be in the middle of your cake)
Cakes - two main kinds - sponge/foam cakes have whipped eggs to provide lightness (might be whole eggs or just whites, Genoise has clarified butter in it), butter cakes - beaten ingredents with a rising agent (e.g. baking powder).
Sponge cake - whisk until very creamy and thick (you should be able to “write” with it and it should stay for a few seconds). Fold in flour by “cut, fold, shake” - cut through the flour, then lift spoon and shake (to distribute the flour), turn the bowl a bit, repeat. If you don’t shake the flour the mixture can clog around it and form lumps. Do this quite quickly and thoroughly but not too much - we don’t want to develop gluten (sponge flour is of course ideal). Pour mixture into pan, shake to level (don’t use a spoon, don’t bang it as that can cause it to collapse, ensure the greaseproof paper if used it clean as any drips on it will burn). When cooked if you lightly press it the indents should bounce back. Fill with cream (make a double-height ring of cream towards the outside edge so that it fills nicely), top with ganache.
Ganache - chocolate + cream. 55% good quality chocolate (75% is too bitter). Take cream to (just before) the boil, then pour over chocolate and whisk to form an emulsion (use a mini-whisk, start small in the middle). You can also use a bain-marie. Ganache is very nice with mascarpone cream in it. Or add booze and a quick stick blend. Can also add tahini or halva.
Fudge icing - butter, milk, cocoa. Mix and heat in a pan, then add icing sugar. If it starts to split, add a dash or two of milk and mix thoroughly. To spread on cupcakes, use the back of a teaspoon and put a big amount in the middle of the cupcake, then press down with the spoon and twirl the spoon in a spiral pushing down and out, moving outwards (so it’s more a “ring” of icing rather than a mountain).
Lemon drizzle cake (or any butter cake) - beat butter+sugar, then add the egg - one at a time and wait until it’s fully emulsified between each egg (might take a few mins). If it splits you can add a little of the flour to absorb the water and re-emulsify it. Finally add the zest, juice by hand - the juice will split the mixture. Pour into the baking tin and “draw” a line down longwise (reach the spatula a good way through the mixture, not just along the top) as this will help the “crack” on the top to develop. Bake. You can make the icing in advance - just add lemon juice to icing and mix with a mini-whisk. Once the cake comes out of the oven, stab it quite a few times with a skewer and the pour the icing over the top (whilst the cake is still in the lining in the baking tin).
Carrot cake - icing should be cream cheese icing (make buttercream then add cream cheese - not mascarpone)
Honey cake - since it’s a very wet mixture, use a whisk to mix it rather than a spoon. Scattering almonds on top works very nicely.
Chocolate and almond cake - bake slowly.